To measure your bike like a pro in just 10 minutes, gather a tape measure, level, notebook, and pen. Stand over the bike for standover height, ensuring 1-2 inches of clearance. Measure from the saddle to the handlebar for reach, and use a level to track the stack from the bottom bracket to the top of the head tube. Keep your measurements accurate, and you’ll quickly get personalized fit information—if you continue, you’ll learn how to optimize your bike setup even further.
Key Takeaways
- Use a flexible tape measure to accurately record standover height, reach, and stack measurements.
- Ensure bike is stable and level, especially for vertical measurements like stack, using a level tool.
- Measure reach from the saddle center to the handlebar horizontally, and stack from bottom bracket to top of head tube vertically.
- Take multiple readings for consistency, and compare results with manufacturer geometry charts for precise fit.
- Use online tools or fit analysis platforms to quickly interpret your measurements and find the ideal bike size.
Gather Your Tools and Get Ready to Measure
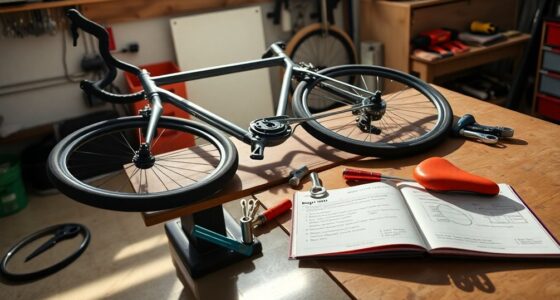
Before you start measuring your bike, gather all the necessary tools to guarantee the process goes smoothly. Proper bike maintenance begins with having the right cycling accessories on hand, such as a tape measure, a level, and a notebook. These tools help you take accurate measurements and keep track of your bike’s dimensions. Check that your tape measure is flexible and durable for precise readings, and have a pen ready to jot down numbers. Make sure your bike is clean and free of dirt or debris, which can affect measurements. Once you’re organized, you’ll be better equipped to assess your bike’s fit and make any adjustments needed for ideal comfort and performance. Proper body jewelry measurements ensure a comfortable and secure fit during your rides. Additionally, understanding projector specifications can help you select the best equipment for your home setup, ensuring optimal viewing quality. Preparing your tools sets the foundation for a smooth, efficient measurement process, and being aware of AI-powered virtual reality in e-learning can also enhance your understanding of how technology can improve training and adjustments. For example, support breakfast options can offer you the energy needed to stay focused during your bike fitting session.
Measure Your Bike Fit: Standover, Reach, and Stack in Simple Steps
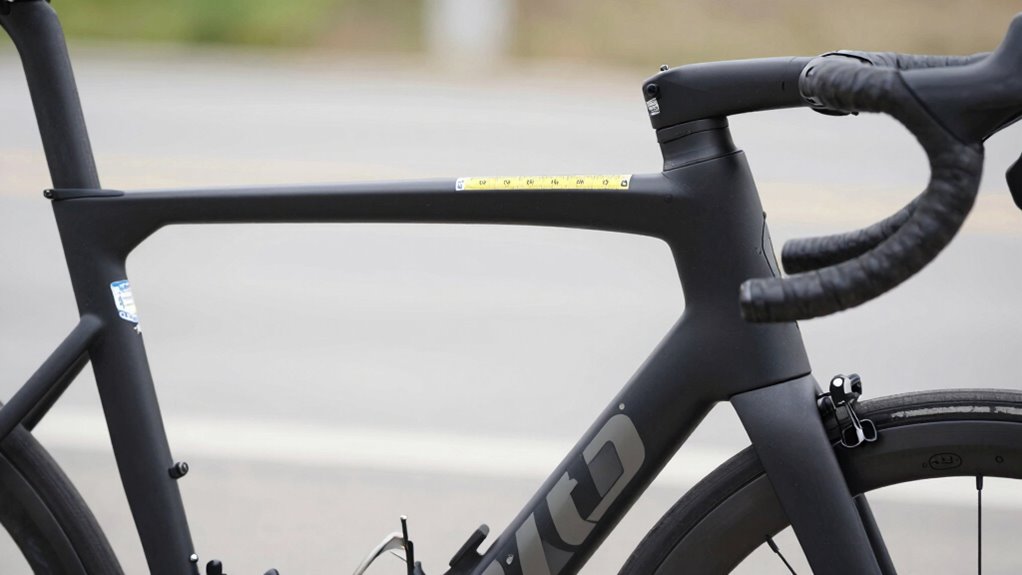
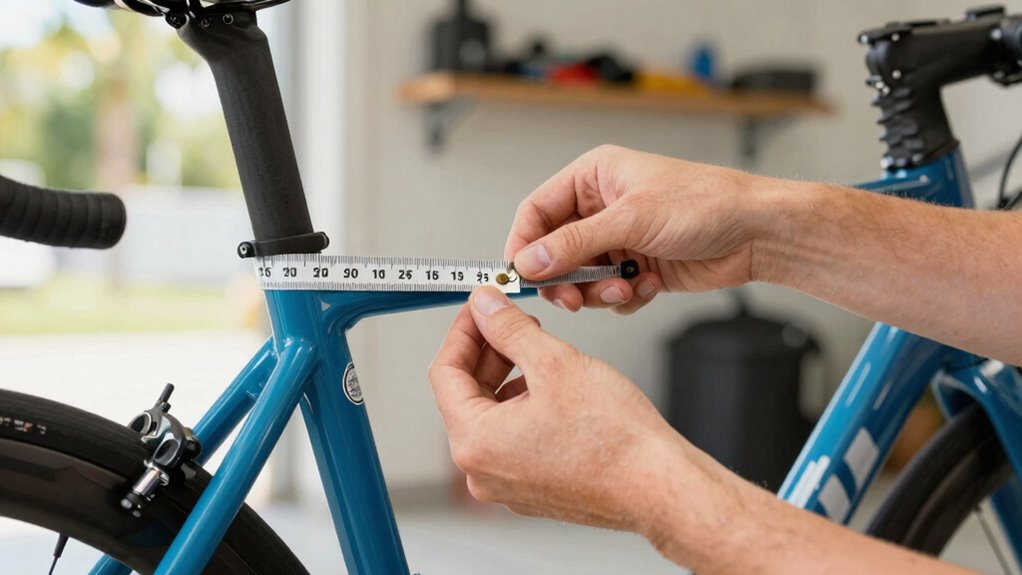
To guarantee a comfortable and efficient ride, accurately measuring your bike fit is essential. Start with understanding your bike’s frame geometry, which influences standover height, reach, and stack. Here’s how to measure effectively:
Ensuring a perfect bike fit starts with understanding key measurements like standover height, reach, and stack.
- Standover Height: Stand over the top tube with your feet flat on the ground. Ensure there’s 1-2 inches of clearance for comfort and safety. Proper standover clearance helps prevent injuries and allows for quick dismounts during sudden stops. When selecting a bike, considering the frame geometry can help you find a model that fits your body dimensions and riding style better. Additionally, knowing your body measurements can assist in choosing the most suitable frame size and geometry for optimal comfort.
- Reach: Measure from the saddle’s center to the handlebars horizontally. This ensures your cockpit length supports ergonomic adjustments. Knowing your reach also assists in bike sizing and optimizing riding posture.
- Stack: Measure from the bottom bracket to the top of the head tube vertically. Proper stack height affects your riding posture and comfort. Knowing these measurements can also help you compare bike models and select the best frame for your specific needs.
Additionally, knowing your bike fit measurements can help you compare different frames and components to find the best setup for your riding style. Using these measurements, you can optimize your bike fit by adjusting components or choosing a frame that matches your body and riding style.
Use Your Measurements to Find the Perfect Bike Fit Quickly
Using your measurements effectively allows you to quickly find a bike fit that feels comfortable and efficient. Accurate measurement accuracy is key in bike fitting, ensuring you select the right frame size and adjustments. With your precise data, you can narrow down options and avoid trial-and-error fittings. Start by comparing your measurements—standover height, reach, and stack—to bike geometries listed by manufacturers. Look for bikes that closely match your measurements to save time and prevent frustration. If you’re shopping online, use your measurements to filter options. When visiting a bike shop, share your numbers with the staff for expert recommendations. This approach streamlines the process, helps you avoid ill-fitting bikes, and ensures you get a comfortable ride tailored to your body. European cloud innovation can also provide valuable tools for analyzing and comparing bike geometries and fit data efficiently, making the process even more user-friendly. Additionally, leveraging digital tools that incorporate measurement comparisons can further enhance your ability to find the perfect fit quickly. Understanding the Horsepower of electric dirt bikes can also help you select a bike that matches your riding style and physical capability for optimal comfort and performance. Incorporating advanced fitting technology can further improve the accuracy of your measurements and the overall bike fitting process.
Frequently Asked Questions
How Often Should I Re-Measure My Bike Fit?
You should re-measure your bike fit every 3 to 6 months to maintain measurement accuracy and guarantee bike fit consistency. Changes in your flexibility, fitness level, or riding style can affect your fit, so regular checks help you stay comfortable and prevent injuries. If you notice discomfort or changes in your riding, it’s a good idea to re-measure sooner. Staying consistent with measurements keeps your ride optimized.
Can Measurements Vary Between Different Bike Brands?
Yes, measurements can vary between different bike brands due to differences in bike design and measurement standardization. You might find that a size labeled as medium in one brand doesn’t exactly match a medium in another. To confirm a perfect fit, focus on bike brand consistency and always compare specific measurements like standover height, reach, and stack rather than relying solely on size labels. This helps you choose the most comfortable, well-fitting bike.
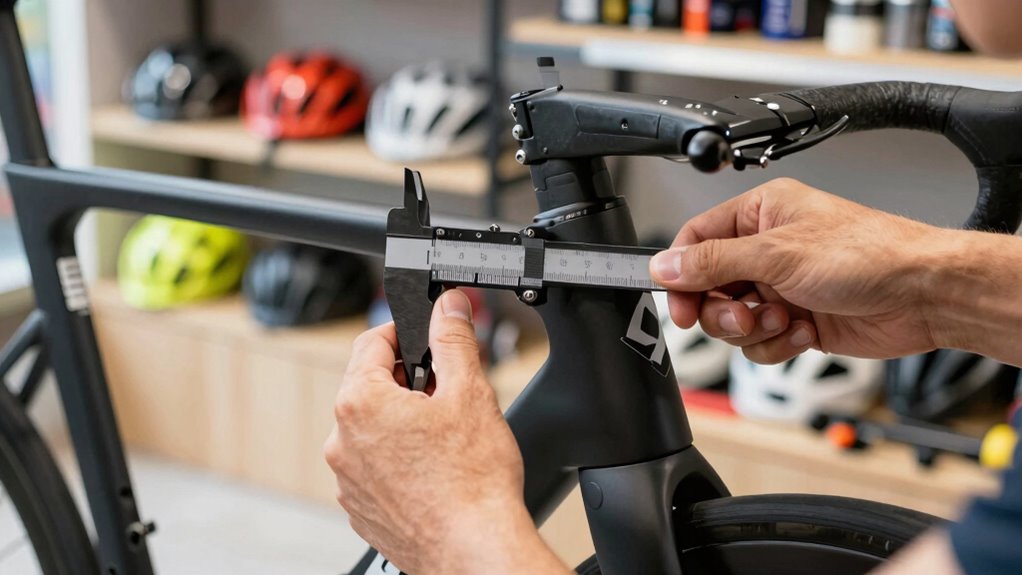
What Tools Are Best for Precise Measurements?
They say “measure twice, cut once,” and that’s true for bike measurements too. To guarantee measurement accuracy, use tools like a digital caliper or a tape measure with calibration techniques. Digital calipers provide precise readings, while a properly calibrated tape measure helps with longer distances. Always double-check your tools for calibration, as accurate measurements are key to choosing the right bike size and ensuring a comfortable ride.
How Do I Adjust My Bike Based on These Measurements?
To adjust your bike, start by setting your saddle height so it’s level with your hip when you stand next to it. Then, tweak the handlebar reach so you can comfortably hold the bars without stretching or bending too much. Use your measurements to fine-tune these adjustments, ensuring a comfortable posture. Make small changes and test ride to find the perfect fit, reducing fatigue and increasing control.
Are There Differences in Fit for Mountain vs. Road Bikes?
Did you know that proper bike fit can boost your efficiency by up to 10%? When choosing between mountain and road bikes, you’ll notice differences in bike geometry and frame sizing. Mountain bikes typically have shorter reach and higher stack for better control on rough terrain, while road bikes emphasize longer reach and lower stack for speed. Always match your frame sizing to your riding style to guarantee comfort and performance.
Conclusion
Now that you’ve measured your bike like a pro, picture yourself riding confidently through scenic trails or bustling city streets, knowing every fit detail supports your comfort. With just a few simple steps, you’ve discovered the secret to a perfect ride—like customizing the saddle height or handlebar reach to cradle you in ease. Keep these measurements in mind, and every journey becomes smoother, more enjoyable, and truly tailored to you. Happy riding!