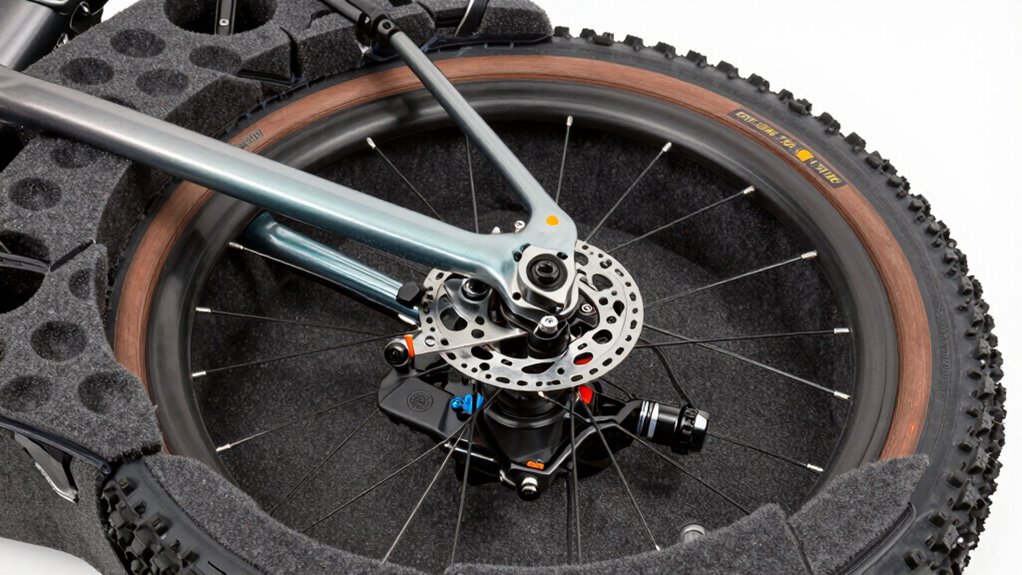
When packing your modern gravel bike, start by carefully removing the thru-axles and boost spacers using the appropriate tools, ensuring you keep track of all small parts. Wrap the frame and wheels with foam or bubble wrap to cushion impacts, and deflate tires slightly to prevent damage. Secure loose components and organize everything for quick reassembly. Properly packing and protecting these key parts will help prevent tears and damage during transit—keep exploring for detailed steps.
Key Takeaways
- Remove or secure thru-axles and boost spacers to prevent damage and ensure proper packing.
- Wrap the entire bike with foam, bubble wrap, or padding to protect delicate components during transit.
- Detach wheels and handlebar components, securing them separately to avoid misalignment or scratches.
- Use water-resistant materials and secure padding to shield the bike from moisture and impacts.
- Organize and label all disassembled parts for efficient reassembly and to maintain proper frame geometry.
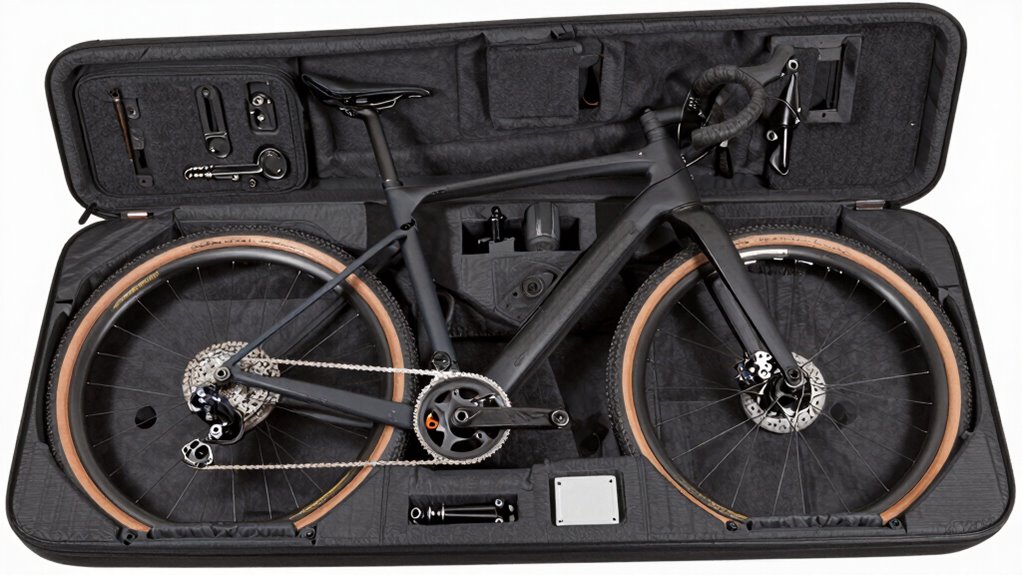
bike travel case for gravel bikes
As an affiliate, we earn on qualifying purchases.
As an affiliate, we earn on qualifying purchases.
How to Pack Your Gravel Bike for Safe Travel
Packing your gravel bike for safe travel requires careful preparation to prevent damage during transit. Begin by protecting your frame with padding or specialized frame protection to avoid scratches or dents. Remove or secure any loose components, especially if your bike has thru-axles or boost spacers. When it comes to tire selection, consider deflating your tires slightly to reduce pressure and prevent tube damage, or use tire liners for added protection. Wrap your tires with bubble wrap or foam to cushion against impacts. Secure the bike firmly in a travel case or box, ensuring it doesn’t shift during transit. Proper frame protection and thoughtful tire handling are essential to keep your gravel bike safe and ready for your next adventure. Additionally, understanding mount, OTA, and camera comparisons can help you choose the right gear for any situation, even when traveling with delicate equipment. To ensure your bike remains safe, consult reliable packing checklists to avoid overlooking critical steps. Moreover, considering European cloud solutions can provide insights into innovative ways to enhance your packing or travel planning strategies. For added peace of mind, using foam padding around sensitive areas can further prevent damage during rough handling. Incorporating proper packing techniques can also significantly reduce the risk of damage during transport.
thru-axle removal tool
As an affiliate, we earn on qualifying purchases.
As an affiliate, we earn on qualifying purchases.
Assess Your Bike and Plan Your Packing Strategy
Before you start packing, take a close look at your bike to identify any specific features or components that may need extra attention. Check your bike frame integrity to make sure there are no cracks or weak spots that could worsen during travel. Consider how your thru-axles, boost spacing, or foam protection might affect packing. Assess your tire pressure management; deflate your tires appropriately to prevent damage and make packing easier. Take note of any delicate parts, such as derailers or disc brakes, and plan how to secure them. Knowing your bike’s unique features helps you decide where to add extra padding or support. A thorough assessment ensures your packing strategy keeps your gravel bike safe and intact during transit. Additionally, understanding your bike’s component compatibility can help prevent potential issues during assembly at your destination. It’s also wise to review packing best practices for gravel bikes to ensure your gear is well protected. To further optimize your packing, consider researching security measures to safeguard your components during transport. Incorporating water-resistant materials can also help protect your bike from unexpected weather conditions during travel. Furthermore, consulting storage options can help you choose the best ways to organize and secure your bike and gear during transit.
bike foam padding for transit
As an affiliate, we earn on qualifying purchases.
As an affiliate, we earn on qualifying purchases.
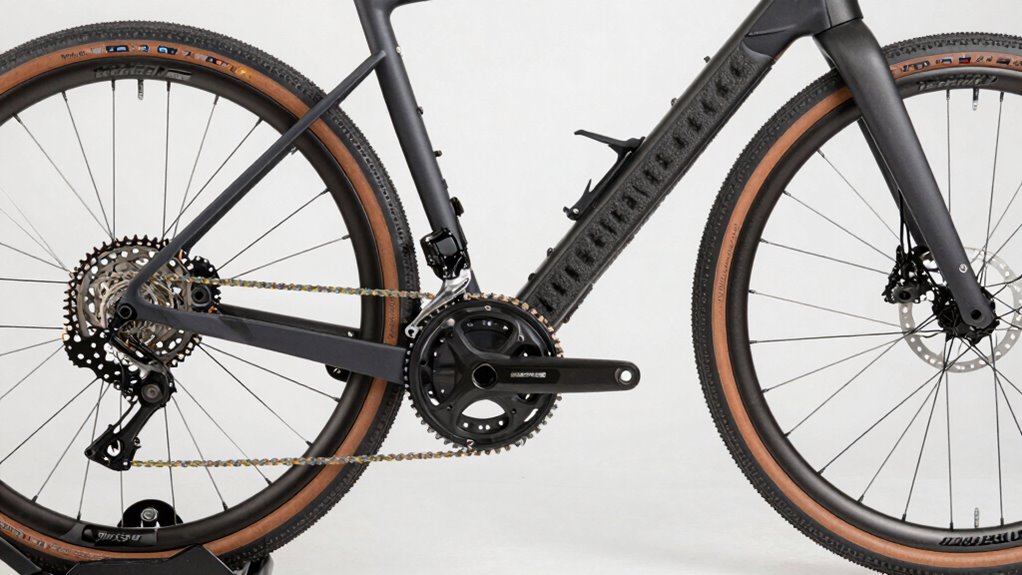
Key Components That Affect Packing and Travel

Certain bike components play a crucial role in how you should pack and secure your bike for travel. Tire pressure is fundamental because it affects how your wheels fit in travel cases or racks—lower pressure can help prevent punctures and damage, but too low might cause deformation. Adjusting tire pressure before packing ensures stability and reduces risk during transit. Additionally, proper bike component selection can simplify the packing process and enhance protection during travel. Frame geometry influences how you position your bike; bikes with aggressive angles or extended reach may require extra padding to avoid frame damage. Recognizing these key components helps you plan your packing strategy effectively. Properly managing tire pressure and considering Frame geometry help prevent shifting, impacts, or breakage during travel, ensuring your bike arrives ready for your next adventure without tears or damage. Additionally, understanding vetted vacuum cleaners can be useful for cleaning your gear after travel to maintain optimal performance. Paying attention to proper packing techniques can further safeguard delicate components during transit. Being aware of modern bike technology can also help you select the most protective cases and packing materials.
bike wheel bubble wrap
As an affiliate, we earn on qualifying purchases.
As an affiliate, we earn on qualifying purchases.
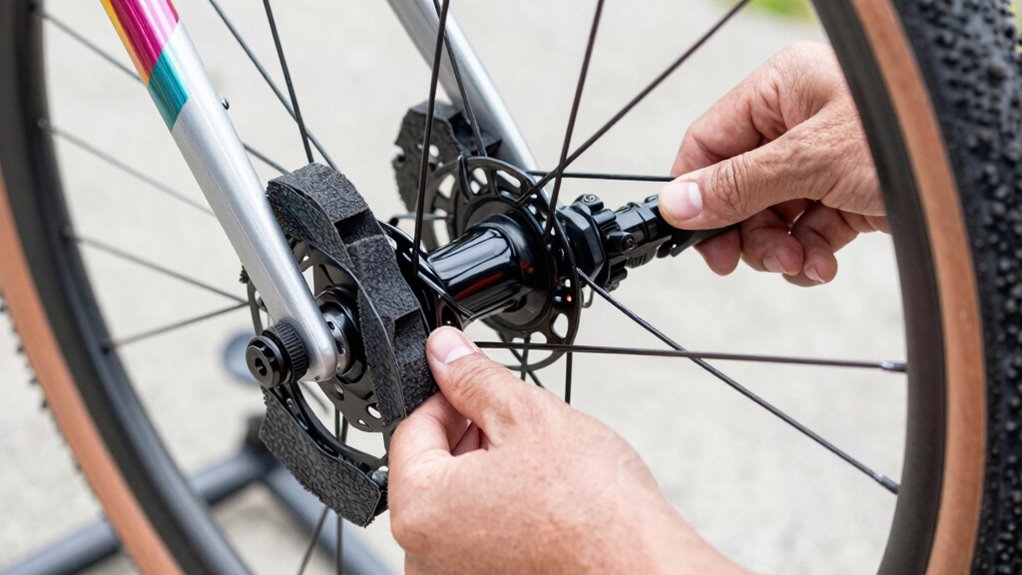
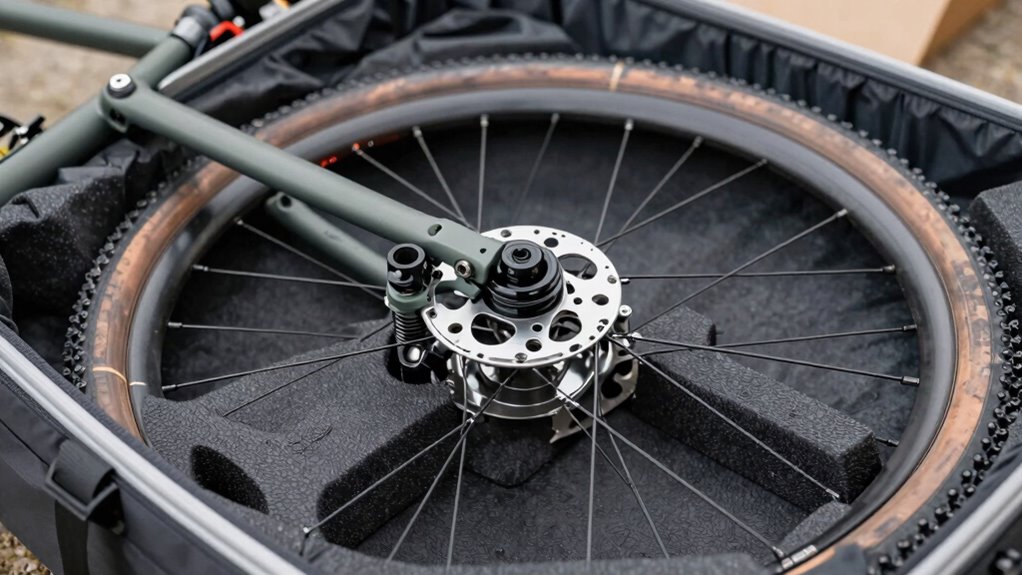
How Do You Remove Thru-Axles and Why It Matters?

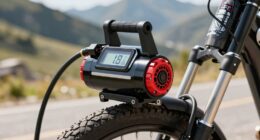
Removing a thru-axle is straightforward once you have the right tools and know the process. Doing this correctly helps prevent damage and makes maintenance easier. Plus, understanding how it affects bike handling guarantees you stay safe on the trail. For added convenience, choosing a stylish dog bed can provide ergonomic support and comfort for your pet during rest periods. Additionally, being familiar with home cinema projector features such as contrast ratio and color accuracy can enhance your viewing experience when setting up your space. Knowing the Gold IRA market can also help you make informed decisions about your investments in precious metals.
Tools Needed and Process
To effectively remove a thru-axle, you’ll need a few basic tools, including an Allen wrench or a thru-axle removal tool designed for your bike’s specific setup. Start by releasing your tire pressure to ease removal and prevent damage to the tire or rim. Once deflated, shift your bike onto a stable surface and locate the thru-axle quick-release or bolt. Unscrew it using the appropriate tool, being careful not to strip the threads. Removing the thru-axle allows you to take out the wheel and access the bike frame for maintenance or packing. Regularly inspecting the body jewelry measurements ensures proper fit and prevents damage, especially during maintenance. Additionally, choosing the correct tools for removal can make the process smoother and safer. Using the proper bike maintenance tools also helps preserve its integrity and ensures smooth reinstallation later. Remember, handling the thru-axle carefully helps preserve its integrity and ensures smooth reinstallation later. Proper tools and a gentle process make removal straightforward and avoid unnecessary damage.
Impact on Bike Handling
When you take out a thru-axle, it temporarily alters how your bike handles by reducing the stiffness and stability of the wheel connection. Without the thru-axle, your bike may feel less responsive, especially during cornering or riding over rough terrain. Changes in tire pressure can amplify these effects, making the bike feel either too soft or too rigid. Additionally, removing the thru-axle can subtly shift your frame geometry, affecting steering and balance. To understand this better, consider how bike handling is influenced by component integrity and setup. Proper re-installation of the thru-axle is essential to maintain optimal component alignment and ensure a safe, controlled ride. Regularly checking your bike components helps prevent handling issues caused by improper assembly or wear. Ensuring correct torque specifications are followed during reassembly is also critical for maintaining component performance and safety. Maintaining proper component torque ensures your bike remains safe and performs as intended during rides.
How to Disassemble Boost-Spacing Frames for Travel
When preparing your bike for travel, start by carefully removing the thru-axles to prevent damage. Next, adjust the dropouts to accommodate the frame’s new position, ensuring it fits securely in transit. This process makes packing easier and helps protect your bike during the journey.
Remove Thru-Axles Carefully
Ever wonder how to safely remove thru-axles from your boost-spacing frame? First, guarantee you have the right tool selection, as thru axle compatibility varies. Using the proper tools prevents damage and makes removal easier. Before starting, check the axle type and size.
| Axle Type | Tool Needed | Compatibility Tip |
|---|---|---|
| Boost | Allen wrench | Confirm fit before applying force |
| Standard | Socket wrench | Match size precisely |
| Thru-axle | Specialized tool | Use manufacturer-recommended |
Carefully loosen the thru-axle, applying steady pressure. Avoid forcing or twisting excessively to prevent damage. Proper tool selection is key to a smooth removal process.
Adjust Dropouts for Transport
To prepare your bike for travel, start by adjusting the dropouts to accommodate the disassembly of your boost-spacing frame. Proper dropout adjustment guarantees easy transport and correct frame alignment afterward. Here’s what you should do:
- Loosen the axle or thru-axle and slide the wheel out.
- Adjust the dropout spacers or bolts to narrow the frame’s width.
- Verify the frame alignment by checking the spacing is even on both sides.
- Secure the adjustments, making sure the dropout is snug but not overly tight.
This process helps prevent frame damage and ensures a smooth reassembly. Keep in mind, accurate dropout adjustment is key to maintaining proper frame alignment during travel.
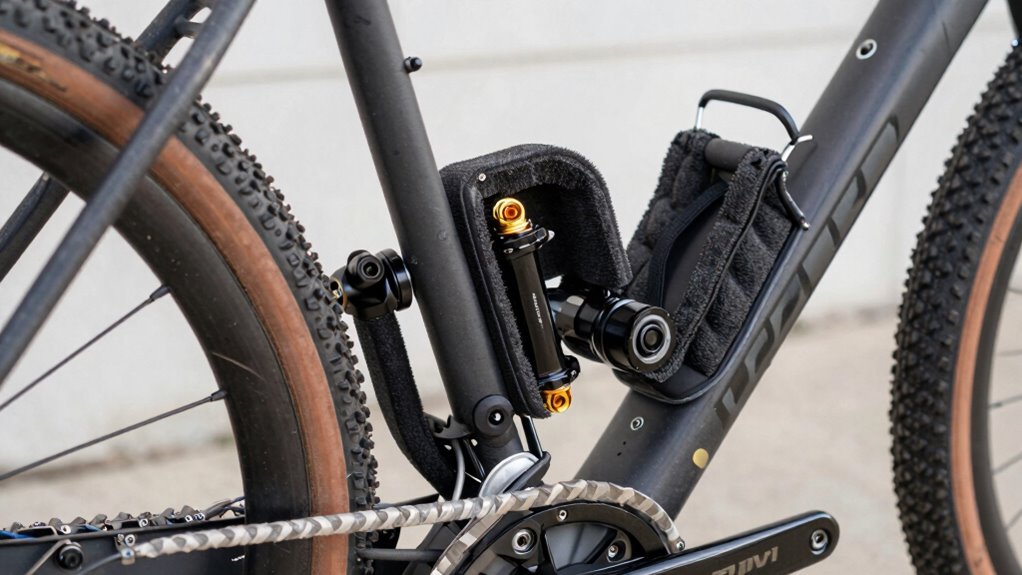
Protect Your Gravel Bike With Foam Padding During Transit
Protecting your gravel bike during transit is essential to prevent damage from bumps and vibrations. Foam padding offers an effective way to safeguard your bike’s frame, components, and delicate parts. Wrap areas prone to impact, like the top tube, down tube, and fork, with foam to absorb shocks. Use dense foam or specialized bike padding to ensure better bike protection without adding unnecessary bulk. Secure the padding with tape or straps to prevent shifting during transit. This simple step minimizes the risk of scratches, dents, and misalignment caused by jostling. Foam padding creates a cushioned barrier that absorbs vibrations and impacts, making your bike less vulnerable during travel. Proper foam protection keeps your gravel bike safe, ensuring it arrives ready for your next adventure.
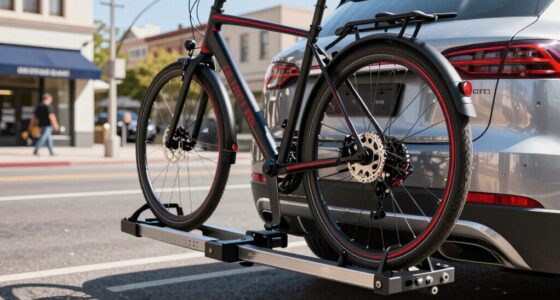
Step-by-Step: Packing Your Gravel Bike for Air or Car Travel
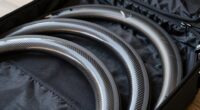
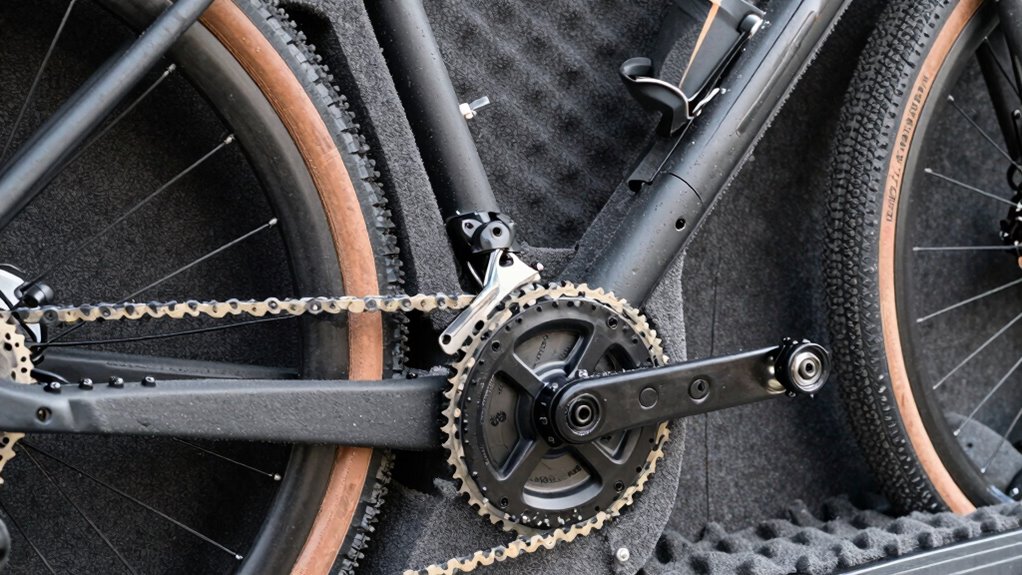
Packing your gravel bike for air or car travel requires careful preparation to guarantee it arrives undamaged. Start by removing your wheels to protect tire clearance and prevent damage to the frame geometry. Next, secure the handlebars by either rotating them parallel to the frame or removing the stem if necessary. Then, wrap the frame with foam padding or bubble wrap to cushion against shocks. Finally, place the bike in a sturdy travel case or box, making sure it’s snug but not forced. Use additional padding around vulnerable areas to prevent movement. Remember to double-check that all components are secure, especially around the through-axles and boost spacing, to keep your gravel bike safe during transit.
How to Reassemble Your Gravel Bike Quickly and Safely
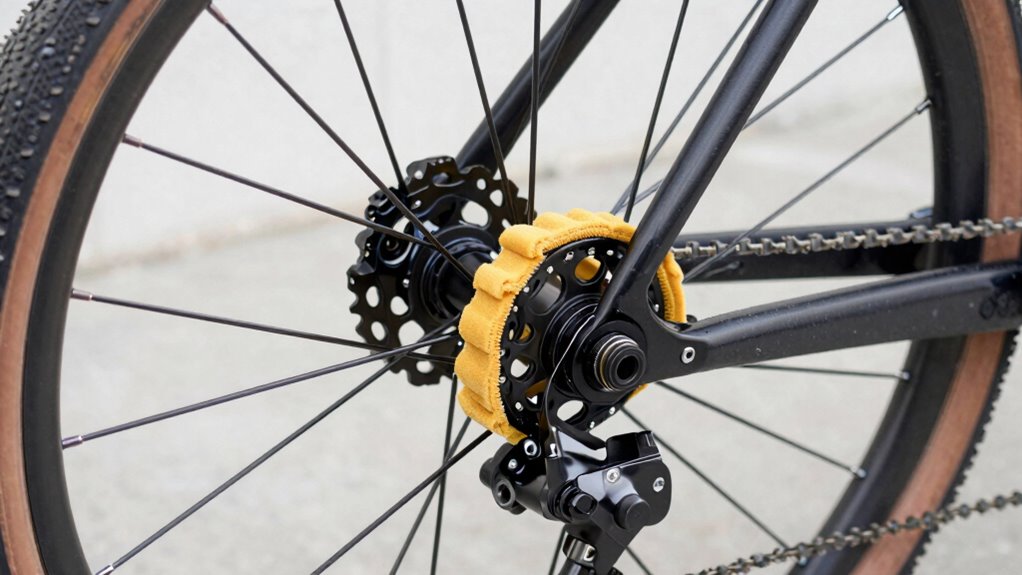
When reassembling your gravel bike, start by gathering all the components and tools you removed during disassembly. Check that each part, especially the frame and fork, aligns with your original frame geometry for ideal handling. Begin by installing the headset and handlebars, ensuring they’re securely tightened to maintain proper steering. Next, reattach the wheels, paying attention to tire clearance to avoid rubbing against the frame or fork. Make sure the thru-axles and boost spacers are properly seated. Reinstall the drivetrain and brakes, verifying that all contact points are tight and functioning correctly. Double-check that the chain runs smoothly and that your tires have adequate clearance to prevent pinch flats or rubbing. This systematic approach keeps your gravel bike safe, efficient, and ready for your next ride.
Tips for Labeling and Organizing Bike Components

Organizing your bike components with clear labels can save you time and frustration during reassembly. Effective component labeling and organizer strategies help you quickly identify parts and maintain order. Here are some tips:
- Use color-coded labels for different groups like drivetrain, brakes, and suspension.
- Write detailed descriptions on labels, including part sizes and compatibility notes.
- Store small components in labeled containers or zip bags to prevent loss.
- Keep similar parts together in designated sections of your organizer, such as separate compartments for bolts and spacers.
Common Packing Mistakes to Avoid With Modern Gravel Bikes
Proper packing is vital to guarantee your gravel bike arrives ready to ride without damage or missing parts. One common mistake is neglecting to protect delicate components like the frame geometry and tire clearance. Failing to secure these areas can lead to bent frames or damaged tires during transit. Avoid over-tightening straps that compress the frame or pinch tires, which can cause deformation. Additionally, not padding around sensitive parts increases the risk of impacts. Use appropriate foam or padding to shield the frame and maintain proper tire clearance. Here’s a quick guide:
| Packing Mistake | Consequence | Prevention |
|---|---|---|
| Not padding frame geometry | Bent or misaligned frame | Use foam or bubble wrap around frame |
| Ignoring tire clearance | Tire damage or deformation | Ensure tires are snug but not squeezed |
| Over-tightening straps | Frame stress or cracks | Secure straps without excessive force |
| Skipping component organization | Parts lost or damaged | Label and organize components carefully |
Frequently Asked Questions
How Do You Prevent Damage to Electronic Components During Packing?
To prevent damage to electronic components during packing, you should prioritize electronic protection by disconnecting batteries and removing sensitive parts if possible. Use packing precautions like bubble wrap or foam padding around electronics to cushion against shocks. Secure cables neatly to avoid strain and potential breakage. Always double-check that all electronic components are well-protected before sealing your bike, ensuring safe transit and avoiding costly repairs.
What Tools Are Essential for Disassembling Modern Gravel Bikes?
Ever wondered what tools make disassembling your gravel bike easier? You’ll need a set of Allen wrenches for axle removal, a torque wrench to avoid over-tightening, and screwdrivers for removing components. Don’t forget frame protection to prevent scratches during disassembly. These tools help you efficiently take apart your bike, ensuring safe packing and transport. Are you ready to tackle your next ride’s packing with confidence?
How Do You Handle Disc Brakes During Packing and Transit?
When packing your gravel bike, handle disc brakes by first removing the brake calipers to prevent damage during transit. Use fork protection to shield the fork and braking components. Carefully secure the calipers with zip ties or brake caliper removal tools, and make sure the fork protection covers the sensitive areas. This prevents brake pad interference and keeps your components safe, ensuring a smooth ride when you get back on the trail.
Can You Pack a Gravel Bike Without Removing the Wheels?
You can pack a gravel bike without removing the wheels, but it’s like fitting a spaceship into a suitcase—tight and risky. To protect your frame, add padding and frame protection tape, especially around delicate areas. Use gear storage solutions to secure loose parts. Just make certain the bike is stable and well-cushioned, and avoid forcing it into tight spots. This way, your bike stays safe during transit without wheel removal.
What Are the Best Storage Solutions for Small Bike Parts During Travel?
You should use modular storage solutions like small, padded compartments or zippered bags to keep your small bike parts organized during travel. Wrap your frame with protective materials to prevent damage, and store components like derailers, brake pads, and quick-release skewers in dedicated sections. This way, you keep everything secure and accessible, avoiding loss or damage. Proper frame protection and modular storage make traveling with bike parts hassle-free.
Conclusion
Think of packing your gravel bike like carefully preparing a fragile sculpture—you want every piece protected and in its right place. I once crammed my bike into a box with just minimal padding, only to find a loose derailleur after arrival. Proper disassembly and organization aren’t just tips—they’re your safeguard against tears and delays. With a little planning, you’ll arrive ready to conquer new trails, not repair broken parts. Happy riding!