
A suspension seatpost is a simple, affordable upgrade that can dramatically boost your comfort on rough roads. It absorbs shocks and vibrations, reducing fatigue and keeping your body aligned. With features like adjustable tension and damping, you can customize support to suit your ride. If you’re tired of jolts and discomfort, this upgrade feels like magic. Keep going to discover how to choose, install, and maintain the right suspension seatpost for your bike.
Key Takeaways
- Suspension seatposts absorb shocks, significantly improving comfort on rough terrains without adding much weight.
- They are affordable upgrades, often around $100, offering noticeable ride quality improvements.
- Adjustable suspension mechanisms allow fine-tuning for personalized comfort and support.
- Easy to install with basic tools, making them a quick upgrade for enhanced riding experience.
- Proper maintenance ensures longevity and consistent performance of the suspension seatpost.
Why Suspension Seatposts Make Rides More Comfortable
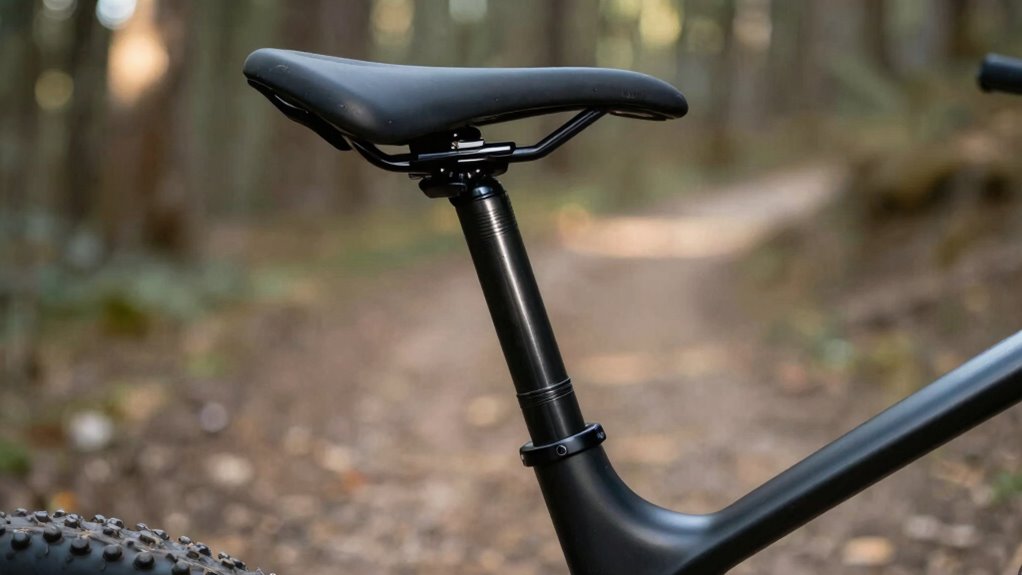
Suspension seatposts considerably enhance ride comfort by absorbing shocks and vibrations from rough terrain. When you ride with one, your bike’s ergonomics improve because you can maintain a more natural cycling posture without constantly fighting against jolts. This allows riders to optimize their riding experience by reducing fatigue and discomfort on long journeys. By smoothing out bumps, suspension seatposts let you focus on your pedaling and enjoy the scenery instead of bracing for every bump. They help keep your body aligned, preventing awkward positions that cause discomfort over time. Whether you’re tackling uneven trails or city streets, these seatposts support your body’s natural biomechanics, ensuring you stay comfortable and efficient throughout your ride. Additionally, understanding how suspension mechanics work can help you choose the right seatpost for your riding style. Proper maintenance, such as checking for fluid leaks and adjusting preload, can prolong the lifespan of your suspension system and maintain optimal performance. Regularly inspecting the internal components can also help prevent unexpected failures and keep your ride smooth. Being aware of performance adjustments can help tailor your suspension setup to your specific riding conditions.
How Do Suspension Seatposts Work to Absorb Shock?
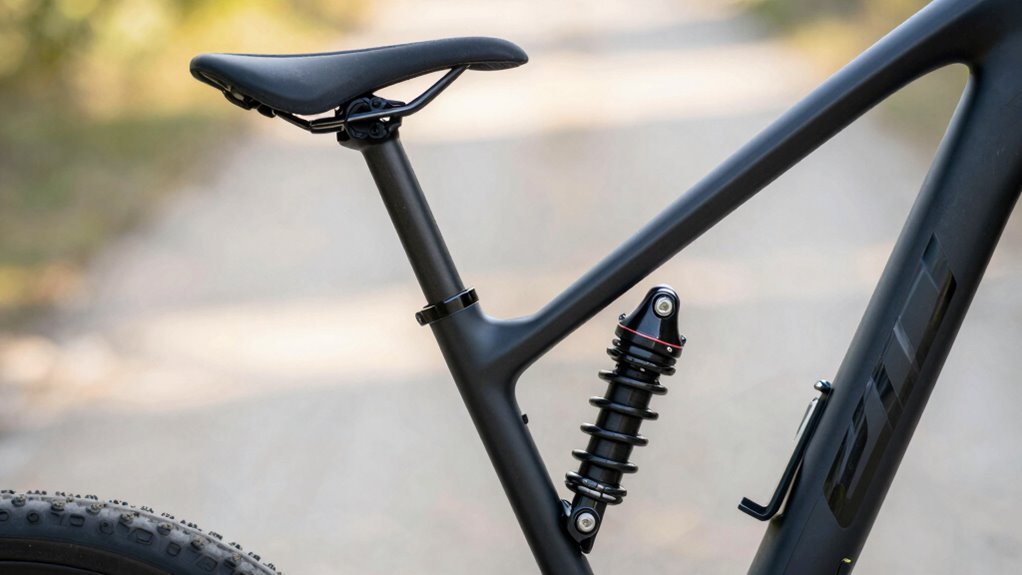
To effectively absorb shocks, suspension seatposts use a combination of mechanical components that work together to dampen vibrations. Inside, a spring or elastomer compresses under impact, reducing shock transfer to you. A damping mechanism, like a hydraulic or air-based system, controls how quickly the seatpost compresses and rebounds, smoothing out rough terrain. This process improves shock absorption and enhances rider comfort, especially on bumpy trails. Here’s a quick overview:
| Component | Function | Benefit |
|---|---|---|
| Spring/Elastomer | Absorbs initial impact | Reduces shock transfer |
| Damping System | Controls compression and rebound | Provides smooth ride |
| Adjustment Knobs | Fine-tunes suspension behavior | Customizes comfort |
Together, these parts work seamlessly to make your ride more comfortable by effectively managing shocks. Understanding how these components interact can help you choose the best suspension seatpost for your needs, especially considering the damping mechanisms involved in shock absorption. Additionally, recognizing the importance of adjustment features can help optimize performance based on terrain. Proper maintenance and tuning of these components ensure sustained performance and comfort over time.
Key Features to Look for When Choosing a Suspension Seatpost
When choosing a suspension seatpost, you should consider the type of suspension mechanism it employs, as this affects how well it absorbs shocks. Additionally, look for adjustability features that let you fine-tune comfort and performance. Don’t forget to balance weight and durability to ensure it suits your riding style and terrain. Incorporating trusted business reviews can also help you find high-quality options that meet your needs. Furthermore, understanding the mechanics of shock absorption can guide you in selecting a seatpost that provides optimal comfort during rides. Recognizing the impact of suspension settings can help you customize your ride experience for different conditions, especially when exploring mysterious terrains that challenge your bike’s suspension capabilities. Considering pilot gear options, such as specialized gloves or grips, can also enhance your control and comfort on rough trails.
Suspension Mechanism Type
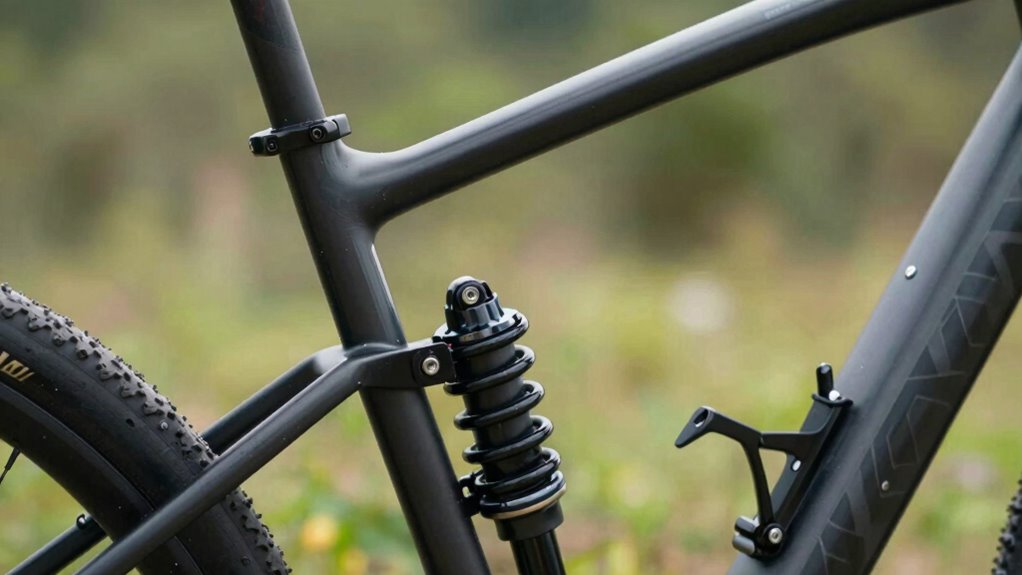
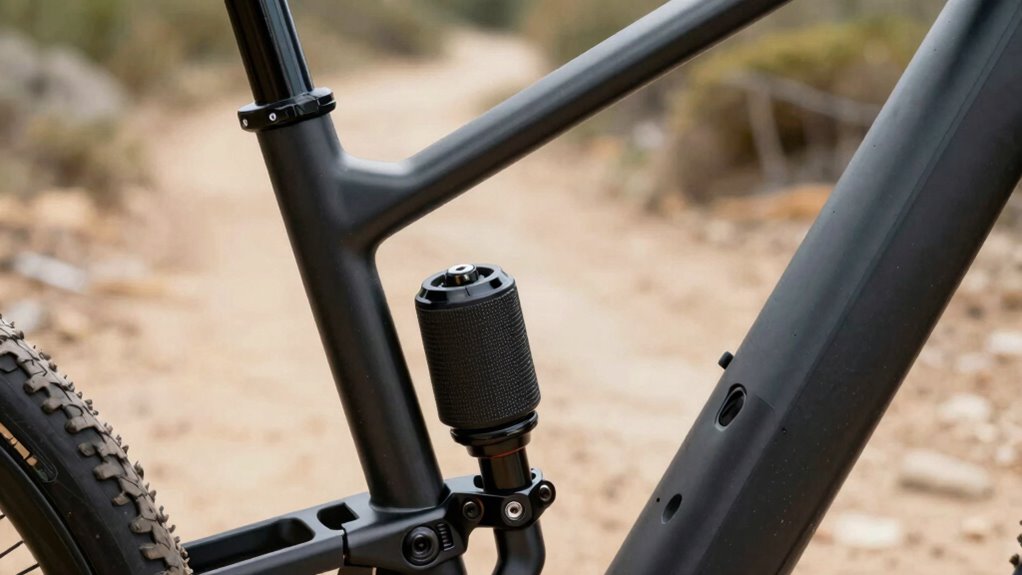
Choosing the right suspension mechanism for your seatpost is crucial because it directly affects ride comfort and performance. There are mainly two types: coil and air. Coil suspension offers durability and consistent support, making it ideal for rough terrain. Air suspension is lighter, adjustable, and offers a smoother ride with less weight. Some models include a lockout feature, allowing you to firm up the suspension on smoother surfaces. Consider your riding style and terrain when choosing. Here’s a quick comparison:
| Feature | Coil Suspension | Air Suspension |
|---|---|---|
| Weight | Heavier | Lighter |
| Adjustability | Limited | Easily adjustable |
| Support & Comfort | Consistent, responsive support | Smoother ride, customizable |
| Lockout Feature | Usually not available | Common feature for firm ride |
Select based on your priorities and terrain. Additionally, understanding suspension mechanism types can help you make an informed decision aligned with your riding needs. When selecting, keep in mind that maintenance requirements can vary between mechanisms, influencing long-term performance and ease of use. Regularly inspecting and servicing your suspension system can prevent issues and extend its lifespan. It’s also beneficial to consider upgrade options to optimize your riding experience.
Adjustability Features
Adjustability features are essential to customize your suspension seatpost for ideal comfort and performance. Being able to easily adjust the seatpost height ensures you get the perfect fit for your riding style, boosting confidence and efficiency. Look for seatposts that offer smooth, precise height adjustments, so you can quickly switch between riding positions or adapt to terrain changes. Saddle angle adjustment is equally important; it helps you find the optimal tilt for comfort and reduces pressure points. A seatpost with simple, reliable controls allows you to fine-tune both height and saddle angle on the fly, making your ride more enjoyable and reducing fatigue. Prioritizing these adjustability features ensures your suspension seatpost truly adapts to your needs. Additionally, adjustability mechanisms that are durable and easy to operate will enhance your riding experience over time. When choosing a seatpost, consider models with quick-release clamps for faster adjustments, which can be especially beneficial during rides. Ensuring that the adjustment controls are ergonomic and straightforward will make your adjustments smoother and more intuitive during rides. For optimal performance, selecting a seatpost with precise control systems can make a noticeable difference in how comfortably and efficiently you ride. Incorporating adjustability features that allow for fine-tuning can also help prevent discomfort during long rides.
Weight and Durability
Ever wonder how to pick a suspension seatpost that won’t weigh down your ride or wear out too quickly? Focus on materials selection to guarantee durability without adding unnecessary weight. Aluminum and carbon fiber are popular choices, offering strength and lightness, while steel tends to be heavier but more durable. Check the construction quality—well-made seatposts resist bending and fatigue over time. Aesthetic design matters too; a sleek, streamlined look can complement your bike’s style without sacrificing performance. Consider how your riding conditions influence durability; rough terrains demand more robust materials. Balance weight and durability based on your riding needs, ensuring your suspension seatpost feels reliable, lightweight, and long-lasting without compromising on style. Additionally, body jewelry measurements can impact the comfort and fit of certain components, so choosing the right size enhances overall performance. Recognizing the importance of floating on water in terms of smooth rides and shock absorption can also guide your selection of a suspension seatpost for optimal comfort. Moreover, understanding Prairie Scenery can inspire you to choose components that perform well in diverse terrains, from smooth city streets to rugged trails.
Installing a Suspension Seatpost: Step-by-Step Guide
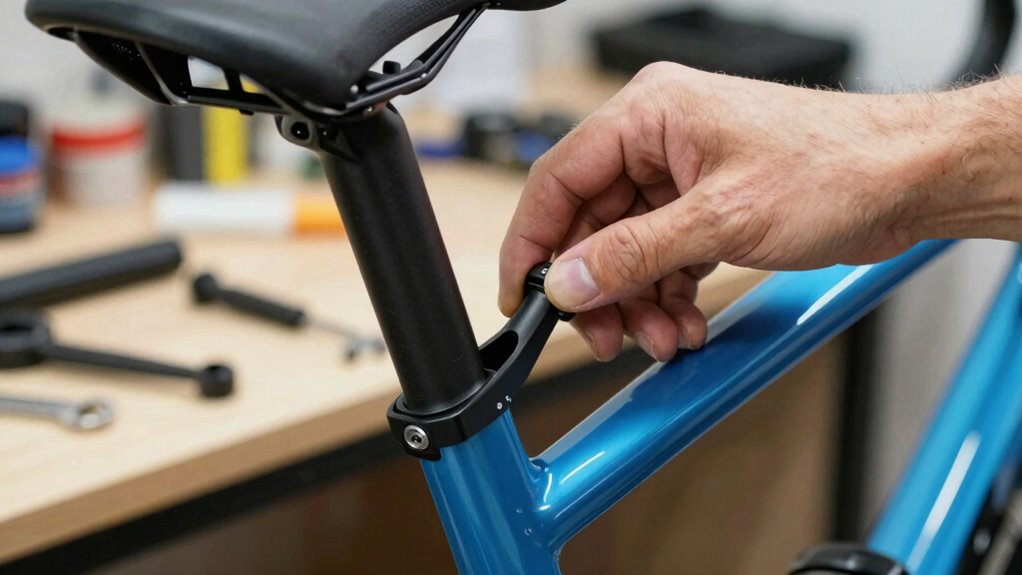
Before you begin installing your suspension seatpost, gather all the necessary tools to make the process smooth. Next, remove your existing seatpost carefully, ensuring you don’t damage the frame. Finally, adjust the suspension tension to your preferred level before securing the new seatpost in place.
Gather Necessary Tools
To guarantee a smooth installation process, gather all the necessary tools before you start. You’ll need tools like an Allen wrench or hex key set to loosen and tighten components. Make sure you have the correct seatpost sizing; measure your seat tube diameter accurately to select the right suspension seatpost. A ruler or caliper can help confirm measurements. If your bike has a clamp or collar, have those tools ready as well. Additionally, keep some grease handy to prevent corrosion and ease installation. Having everything prepared saves time and prevents interruptions mid-task. Double-check your tools and measurements before beginning to ensure you’re ready to proceed smoothly with the installation. Proper preparation makes the entire process easier and more efficient.
Remove Existing Seatpost
How do you remove an existing seatpost? Start with seatpost removal by loosening the clamp bolt. You might need to clean or apply lubricant if it’s stuck. Follow these steps:
- Raise your bike or flip it upside down for easier access.
- Loosen the seatpost clamp bolt with the appropriate tool.
- Gently wiggle and slide the seatpost out of the frame.
- Check for any debris or rust that could hinder removal.
- Clean the seat tube and inspect for damage as part of bike maintenance.
If the seatpost is stubborn, avoid forcing it to prevent damage. Patience is key during seatpost removal, ensuring your bike stays in good shape for future upgrades.
Adjust Suspension Tension
Once you’ve removed the old seatpost, it’s time to focus on adjusting the suspension tension of your new suspension seatpost. This step is vital for fine tuning comfort and ensuring a smooth ride. Check the manufacturer’s instructions to locate the tension adjustment mechanism, usually a knob or a screw. Turn it clockwise to increase tension for more support or counterclockwise to soften the suspension. Test the tension by sitting on the seat and observing how it absorbs bumps. Adjust gradually, making small changes until you find the perfect balance between responsiveness and comfort. Properly adjusting suspension tension enhances your ride quality and helps prevent unnecessary fatigue. Take your time to fine tune the setup for a personalized, comfortable cycling experience.
Comparing Budget Options: Which Suspension Seatpost Offers the Best Value?

When you’re on a budget, finding a suspension seatpost that balances performance and affordability can feel overwhelming. To make your choice easier, focus on value comparison among top budget options. Consider these key factors:
Balancing performance and affordability is key when choosing a budget-friendly suspension seatpost.
- Price: Find the best balance between cost and features.
- Build quality: Guarantee durability without overspending.
- Travel length: Match the suspension travel to your riding style.
- Adjustability: Look for simple, effective tension adjustments.
- Brand reputation: Trust brands known for reliable performance.
Troubleshooting Common Suspension Seatpost Issues and Maintenance Tips

Suspension seatposts can enhance your ride, but like any component, they may encounter issues over time. In mountain biking, smooth operation is key to maintaining saddle comfort and control. If you notice sticking or uneven movement, check for dirt or debris in the stanchion or seals and clean them carefully. Loss of responsiveness could mean low air pressure or a need for re-lubrication; follow the manufacturer’s guidelines. Regularly inspect for leaks, cracks, or corrosion, and replace worn parts promptly. Maintaining proper pressure and cleaning after muddy rides keeps your suspension working smoothly. Troubleshooting common issues ensures your seatpost continues to absorb shocks effectively, giving you a more comfortable, confident ride on rugged terrain. Proper maintenance prolongs lifespan and preserves saddle comfort.
Frequently Asked Questions
What Is the Typical Lifespan of a Suspension Seatpost?
A suspension seatpost typically lasts around 2 to 5 years, depending on your riding habits and maintenance. You should monitor its seatpost durability and suspension lifespan regularly, looking for signs of wear or reduced performance. Proper cleaning and occasional lubrication can extend its life. If you notice increased play or decreased comfort, it might be time to replace or service your suspension seatpost to maintain peak performance.
Are Suspension Seatposts Compatible With All Bike Frames?
Suspension seatposts aren’t compatible with all bike frames. You need to verify your frame’s compatibility, especially the seat tube diameter and suspension compatibility. Material considerations matter too—some frames, like carbon, might require specific models or extra reinforcement. Before upgrading, measure your frame carefully and consult your bike’s specifications. This ensures you choose a suspension seatpost that fits perfectly, delivering the smooth ride you’re after.
How Much Weight Do Suspension Seatposts Add to a Bike?
Adding a suspension seatpost is like giving your bike a feather-light cushion—generally, it adds between 200 to 350 grams, or roughly half a pound to three-quarters of a pound. To keep it lightweight, consider alternative materials like carbon fiber. When installing, follow proper tips like tightening bolts correctly and checking compatibility, ensuring the upgrade enhances your ride without weighing it down.
Can Suspension Seatposts Be Adjusted for Different Riding Styles?
Yes, suspension seatposts can be adjusted for different riding styles. Use adjustment techniques like changing the preload or air pressure to customize the suspension feel. For rough terrain, increase stiffness; for smooth surfaces, soften it. Many suspension seatposts feature quick-release or lockout options, making it easy to adapt to your riding style on the fly. This flexibility helps you stay comfortable and maintain control, regardless of where you’re riding.
What Maintenance Is Required to Keep a Suspension Seatpost Functioning Properly?
To keep your suspension seatpost working smoothly, you should regularly check and perform seatpost lubrication, ensuring the moving parts stay slick and prevent squeaks. You also need to regularly calibrate the suspension, adjusting air pressure or rebound settings for best comfort. By maintaining proper lubrication and suspension calibration, you preserve performance, extend lifespan, and enjoy a ride that feels just as responsive and comfortable as the day you installed it.
Conclusion
Think of a suspension seatpost as your bike’s secret shield, softening the bumps and protecting your ride from rough terrains. For just $100, it transforms every journey into a smoother adventure, turning harsh jolts into gentle whispers of comfort. When you upgrade, you’re not just adding gear—you’re revealing a new level of confidence and joy. Embrace this small upgrade, and let your bike carry you effortlessly over life’s rocky paths.