
Before buying or mounting a rack, you need to verify all your mounting points carefully. Measure your space, confirm the rack’s dimensions and weight capacity match what your setup needs, and check the mounting hole patterns for compatibility. Don’t forget to take into account airflow and access clearance. Skipping these steps risks instability or damage. To make sure your rack fits perfectly, look into this detailed checklist—you’ll find everything you need to know.
Key Takeaways
- Measure the rack’s dimensions and compare with available space, including clearance for ventilation and door swings.
- Verify mounting hole patterns on both the rack and equipment for compatibility.
- Assess the weight capacity of the rack and mounting surface to prevent overload.
- Check for obstructions or irregularities in your space that could hinder installation.
- Confirm that mounting hardware and supports align with device specifications for secure attachment.

TANX Bike Racks for Ebikes,Fat Tire Bike Rack for Tow Hitch 2-Bike 160 lbs Capacity,Hitch Bike Rack for Heavy E Bike, Wobble Free Smart Tilting Folding Bicycle Car Racks for Standard, 2 inch Receiver
🚲【Universal 2-Inch Hitch Fit for 2 Bikes & Heavy-Duty Construction】 Effortlessly mounts to any 2" hitch receiver (SUVs,...
As an affiliate, we earn on qualifying purchases.
Why Checking Mounting Points Before Buying Is Critical

Before purchasing a rack mount, it’s essential to verify the mounting points to guarantee compatibility. Properly checked mounting points ensure your rack’s durability, preventing unnecessary stress or damage over time. If the mounting points don’t match, you risk compromising the stability and longevity of your equipment. Additionally, knowing the exact placement helps you determine if your current installation tools are sufficient or if you need specialized equipment. Using the right tools during installation minimizes errors and protects your gear. Failing to verify these points can lead to costly mistakes, reduced rack stability, and potential safety hazards. Always double-check the mounting points to ensure your rack will fit securely and perform reliably, giving you peace of mind and extending your rack’s lifespan. Moreover, understanding projector specifications can help you assess whether your setup will accommodate the equipment properly. Incorporating smart home automation principles can also streamline your installation process and enhance overall system reliability. Ensuring proper load distribution is also critical to maintain the safety and stability of your mounted equipment. Additionally, considering European cloud solutions can help optimize your cloud infrastructure for energy efficiency and security, aligning with sustainable practices. You should also consider mounting point standards to ensure your setup complies with industry guidelines and enhances safety.

Young Bike Rack Hitch for Car - 200LB 2-Bike Rack Hitch Mount Platform Style Hitch Bike Rack,Smart Tilting & Easy Fold for Car SUV with 2 Inch Receiver,Bike Carrier Fits Up to 5-inch Fat Tire
SAFE & STABLE FOR CARS & SUVS:This hitch rack securely holds your bikes with soft padded hooks to...
As an affiliate, we earn on qualifying purchases.
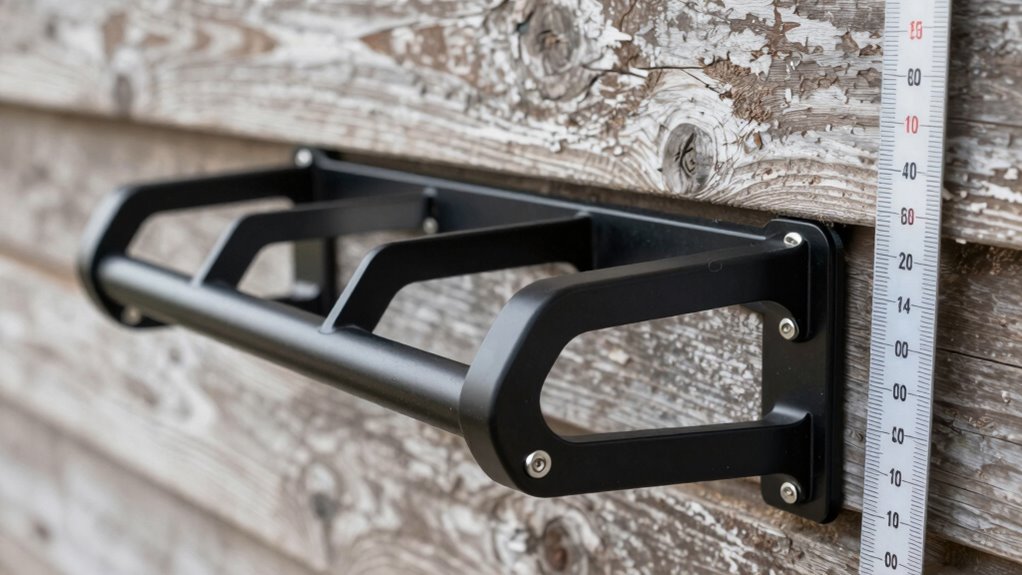
How to Measure Your Space to Ensure a Perfect Rack Fit
Start by measuring the exact dimensions of your space to make certain your rack will fit comfortably. Don’t forget to check for any obstructions or equipment that might limit placement. Properly accounting for clearance guarantees easy installation and proper ventilation. Additionally, consider the sticking wall decor options available to ensure your rack remains securely mounted over time.
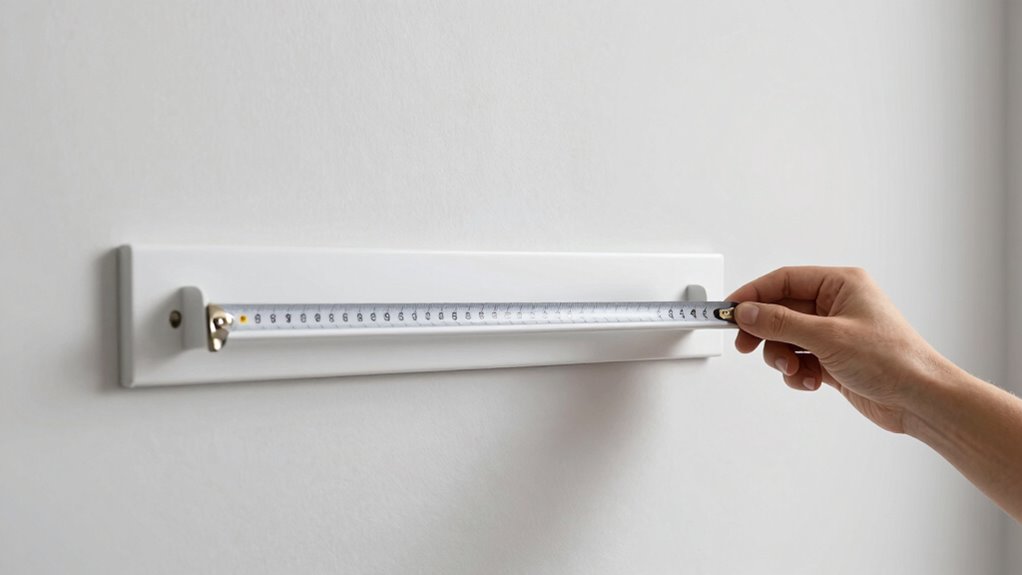
Measure Available Space Precisely
To guarantee your rack fits perfectly, you need to measure the available space accurately. Start by noting the height, width, and depth of the area. Use a tape measure for precision, and double-check your measurements. Keep in mind that rack color can influence how the unit blends into your decor, while material composition affects weight and durability. Picture your space with these details in mind:
- The height clearance, including any molding or light fixtures
- The width between sidewalls or support beams
- The depth from the wall to the front edge
- Any uneven surfaces or obstructions that might affect fit
- Considering free floating design elements can help maximize space efficiency and flexibility
Accurate measurements ensure you select a rack that complements your space and meets your needs without surprises. Understanding space planning is essential for a seamless fit and optimal use of your environment.
Account for Obstructions and Clearance
Have you accounted for obstructions and clearance when measuring your space? Obstruction clearance is vital for a seamless fit and safe installation. Check for any walls, pipes, or fixtures that might interfere with your rack’s placement. Remember, clearance isn’t just about width and height—allow extra space for door swings, ventilation, and easy access. Failing to consider these obstructions can lead to poor space optimization, making your setup less functional. Take precise measurements around potential obstacles and plan for enough room to maneuver the rack into position. By proactively accounting for obstructions and clearance, you ensure your rack fits perfectly without forcing or adjustments later. It’s a simple step that prevents headaches and maximizes your available space efficiently.

Young Hitch Mount Bike Rack with Ramp, 200 lbs. Capacity for 2 E-Bikes, Fat Tire and Standard, fits Cars, SUVs, RVs, Trailers with 2 Inch Receiver
DURABLE and SAFE: Young Electric bike rack is constructed with reinforced steel and aluminum which makes it durable...
As an affiliate, we earn on qualifying purchases.
Understanding Your Rack’s Dimensions and Compatibility

Understanding your rack’s dimensions and compatibility is essential for a smooth mounting process. You need to know the exact size, weight capacity, and mounting options to guarantee everything fits correctly. When considering rack customization and aesthetic considerations, think about how the rack will blend with your setup. Visualize:
- The height and width of the rack, ensuring it fits your space
- The depth, matching your equipment’s size
- The weight capacity, supporting all your gear securely
- The mounting points, compatible with your existing hardware
This knowledge helps prevent surprises and guarantees your equipment is installed safely. Properly evaluating these factors ensures your rack not only fits but also aligns with your aesthetic preferences, creating a clean, professional look. It’s all about compatibility and fitting and making sure your setup functions efficiently. Understanding rack specifications is crucial for safe and effective installation. Additionally, considering equipment compatibility helps ensure your gear integrates seamlessly with the rack design.

PacificCrest Bike Rack Hitch for Car, 160Lbs Heavy Duty 2-EBike Platform Hitch Rack, Foldable E Bike Carrier w/Tilt-Away for Car SUV, Anti-Rattle Lock, Up to 5-Inch Fat Tire for 2'' Receiver
【Engineered for Stability, Designed for Protection】 Tough enough for rugged trails, yet gentle enough for carbon frames. The...
As an affiliate, we earn on qualifying purchases.
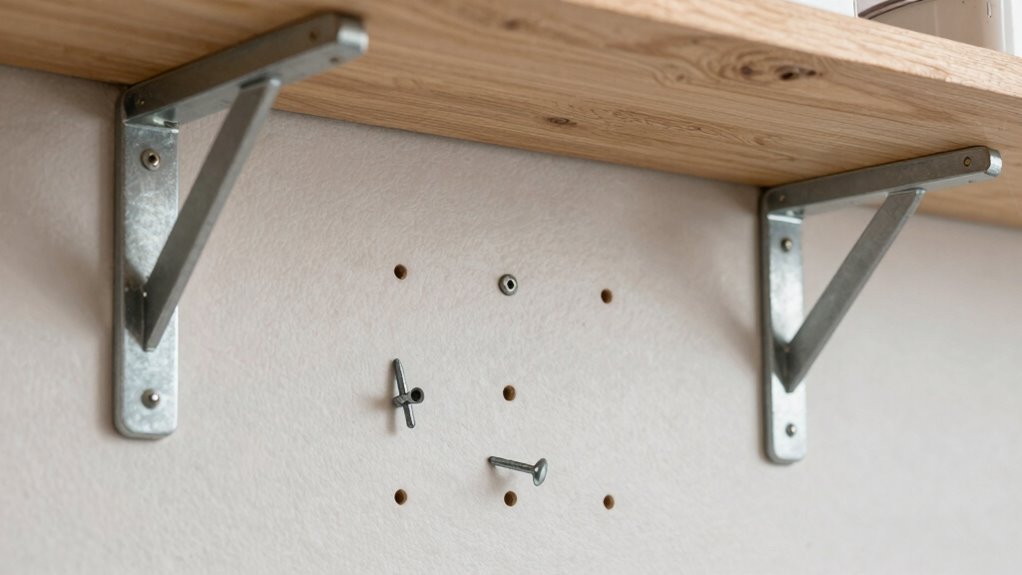
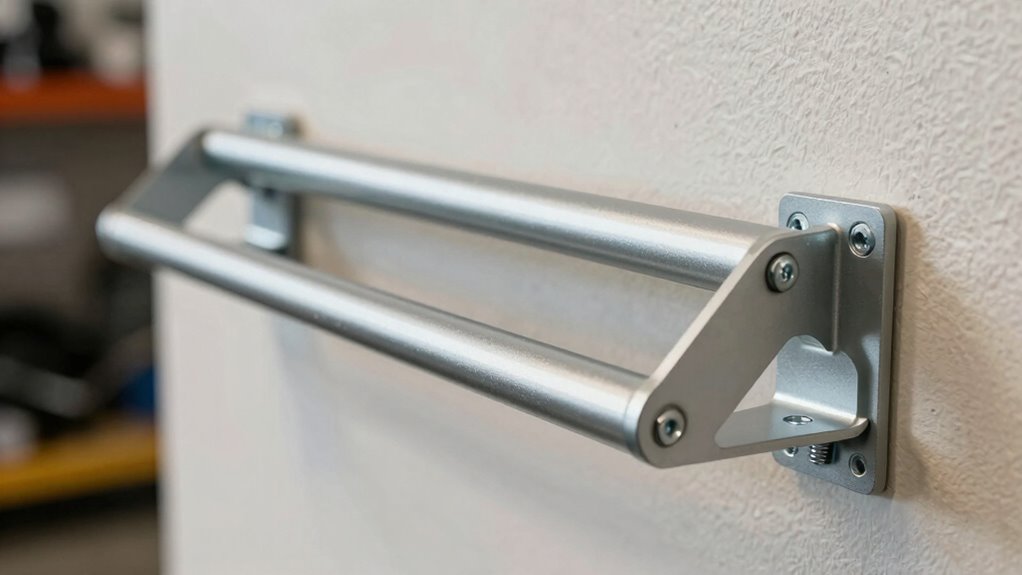
How to Identify Mounting Patterns and Hole Spacing
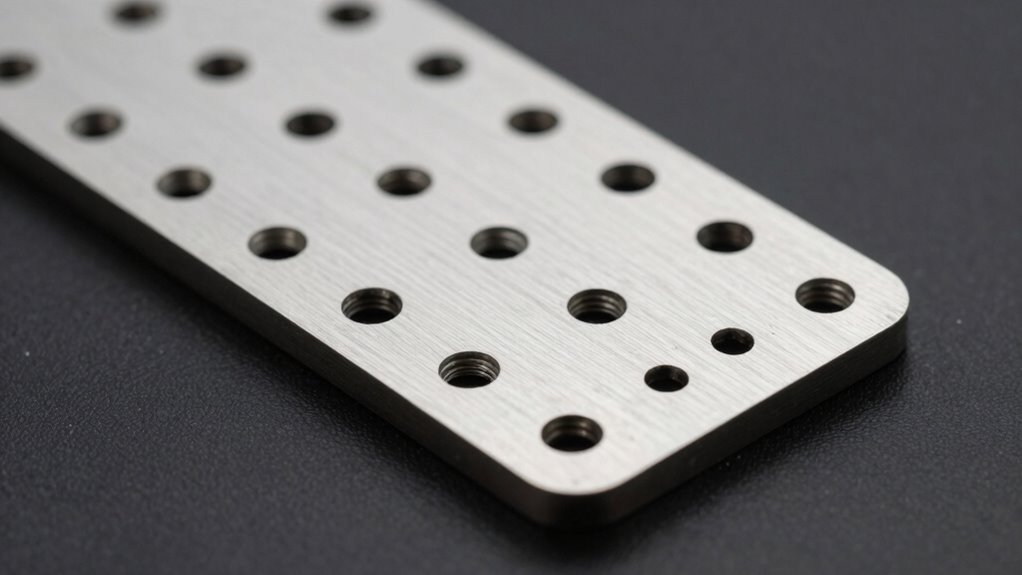
Identifying mounting patterns and hole spacing is essential for guaranteeing your equipment fits securely in your rack. First, examine the back or sides of your device to locate the mounting holes. Measure the hole spacing accurately, noting the distance between holes both horizontally and vertically. Most rack-mounted gear uses standard mounting patterns, such as 19-inch or 23-inch widths, with hole spacing typically at 0.375 inches (3/8 inch) apart. Some equipment features different hole configurations, so confirm the pattern and spacing match your rack’s mounting rails. Use a ruler or caliper for precise measurements, and compare these to your rack’s specifications. This process ensures compatibility, helping you avoid the frustration of incompatible gear and ensuring a secure, stable installation. Understanding mounting standards can further streamline this process and improve your overall setup. Being familiar with rack compatibility is also beneficial when selecting new equipment or upgrades, especially since variations in mounting patterns can affect installation success. Additionally, consulting manufacturer specifications can provide clarity on the proper mounting configurations.
Checking the Rack’s Weight Capacity and Structural Support

Before mounting equipment, you need to verify the rack’s weight limits and make certain it can support your gear safely. Check the structural integrity of the rack to spot any weaknesses or damage. Ensuring the structural support is adequate can prevent unexpected failures over time. Proper installation procedures are also crucial to maintain stability and safety. Additionally, confirm that the mounting hardware is strong enough to handle the intended load. You should also consider load capacity and how it relates to your equipment to avoid overloading the rack. Additionally, ensure that the load distribution is balanced to prevent undue stress on any single point. Incorporating connected fitness technology can also help monitor the load and alert you to any potential issues before they become problematic.
Check Weight Limits
To guarantee your rack can safely support all equipment, you need to check its weight limits carefully. First, review the manufacturer’s specifications to understand its maximum load capacity. Keep in mind that the rack material influences strength—metal racks generally support more weight than certain plastics or composite materials. Aesthetic considerations also matter; a sturdy-looking rack with sleek design might still have lower weight limits. Visualize the setup with these points:
- The weight of your heaviest equipment
- Distribution of weight across the rack
- Compatibility with rack material strength
- Overall aesthetic look versus structural support needs
Additionally, understanding nanotechnology advancements can inform you about innovative materials that combine strength with lightweight properties, enhancing your rack’s load capacity without compromising design. Ensuring these factors align prevents overloading and damage, maintaining both safety and visual appeal. Always verify the weight limits before mounting to avoid surprises later.
Assess Structural Integrity
Evaluating the structural integrity of your rack is vital to guarantee it can safely support your equipment. Start by examining the material durability—ensure the rack’s frame is made from sturdy, high-quality materials that won’t weaken over time. Look for signs of corrosion, cracks, or warping, which compromise support. The aesthetic design also matters; a well-constructed rack with reinforced joints and a solid base indicates better structural support. Check the thickness of the material and the quality of welds or fastenings, as these influence weight capacity. Remember, a visually appealing rack isn’t enough—its underlying strength determines safety and longevity. Proper material durability directly impacts the rack’s ability to withstand environmental stresses over time. Additionally, consider the mounting point when choosing a rack, as it affects overall stability and weight distribution. Ensuring the weight capacity is suitable for your load prevents potential failures and ensures your setup remains secure and reliable. Understanding structural support helps prevent potential failures and ensures your setup remains secure and reliable. To further guarantee safety, check if the rack complies with relevant industry standards for load-bearing support and safety.
Confirm Mounting Strength
Ensuring your rack can handle the weight of your equipment is essential for safety and stability. Confirming the mounting strength involves checking the rack material and its weight capacity against your gear. Start by reviewing the rack’s specifications, making sure it’s rated for your equipment’s total weight. Use appropriate installation tools—drills, level, and anchors—to secure the rack firmly. Consider the following:
- The durability of the rack material, like steel or aluminum
- The maximum weight capacity listed by the manufacturer
- The sturdiness of your wall or mounting surface
- Proper use of installation tools to avoid weak points
Matching Rack Mounting Points to Your Existing Infrastructure

Matching your rack mounting points to your existing infrastructure requires careful measurement and assessment of your current setup. You need to verify compatibility with the rack material and how it integrates into your space. Consider the color coordination to blend seamlessly with your environment, avoiding visual clutter. To help, review this table:
| Rack Material | Mounting Point Compatibility | Aesthetic Consideration |
|---|---|---|
| Steel | Standard mounting patterns | Matches most industrial setups |
| Aluminum | Lighter, adaptable | Easier to color coordinate for a sleek look |
| Wood | Custom mounting solutions | Blends well with natural decor |
Common Fit Issues and How to Avoid Them
One common fit issue is selecting rack mounting hardware or points that don’t align perfectly with your equipment or existing infrastructure, which can lead to instability or damage. Misaligned mounting can cause sagging cables, clutter, and hinder airflow. To avoid this, check for:
- Proper spacing between rack rails and equipment dimensions
- Compatibility of mounting holes with your hardware
- Clear cable pathways to prevent tangling
- Aesthetic considerations like neat cable management and clean appearance
Ignoring these factors can make installation difficult and compromise both stability and visual appeal. Ensuring a precise fit helps maintain organized cable management, reduces strain on connectors, and keeps your setup looking professional. Taking these precautions saves time and prevents costly adjustments later.
Tips for Using a Mounting Point Checklist During Selection

Using a mounting point checklist effectively during selection helps you identify potential issues early and streamline the installation process. Start by reviewing your rack accessories to verify compatibility with your existing equipment and space constraints. Check the mounting points for strength, position, and accessibility, making sure they match your rack’s specifications. Keep a list of necessary installation tools to avoid delays or missed steps. As you evaluate the rack, note any gaps or mismatched mounting options. Use the checklist as a guide to verify clearances, weight limits, and mounting patterns. This proactive approach minimizes surprises during installation, saving you time and effort. By following these tips, you’ll select a rack that fits perfectly and supports your setup’s needs from the start.
Final Checklist: Confirm Your Rack Will Fit Before Purchasing
Before purchasing a rack, it’s important to double-check that it will fit your space and support your equipment properly. Measure your area carefully, considering clearance for access and ventilation. Confirm the rack’s dimensions against your space—depth, width, and height. Check the rack materials for durability and weight capacity, ensuring it can handle your gear. Also, review available color options to match your setup aesthetic. Visualize how the rack will fit within your environment, avoiding tight fits or obstructions. Think about mounting points’ compatibility with your existing infrastructure. Finally, verify the weight capacity and stability features. A quick mental run-through with these points helps prevent surprises after purchase, ensuring your rack will fit perfectly, look good, and function reliably in your space.
Frequently Asked Questions
Can I Modify My Existing Mounting Points to Fit a New Rack?
Yes, you can modify your existing mounting points with custom mounting solutions and rack modification techniques. First, assess the strength and compatibility of your current setup. Then, consider adding brackets, reinforcing plates, or drilling new holes as needed. Always verify your modifications are secure and won’t compromise the rack’s stability. If unsure, consulting a professional can help you achieve a safe, effective fit tailored to your specific rack and vehicle.
What Tools Are Necessary for Checking Mounting Point Compatibility?
Think of checking your mounting points as opening a hidden door. Your tools checklist should include a measuring tape, a level, a drill, and a socket set for compatibility testing. With these, you can measure distances, guarantee level alignment, and drill with precision. Trust these tools to reveal whether your rack will fit seamlessly, turning uncertainty into confidence and making sure your setup stands strong against the test of time.
How Do Environmental Factors Affect Rack Mounting and Stability?
Environmental impact and stability concerns directly influence your rack’s mounting and performance. Harsh conditions like wind, rain, or extreme temperatures can weaken mounting points and cause instability over time. You need to take into account these factors when choosing a location and materials, ensuring your rack is secure and durable. Regular inspections help prevent environmental damage from compromising stability, keeping your equipment safe and operational regardless of outdoor conditions.
Are There Industry Standards for Mounting Point Spacing?
Think of industry standards as the backbone of reliable rack installation. Yes, there are industry standardization and mounting point regulations that specify spacing, ensuring compatibility and safety. These standards help you avoid guesswork, promote uniformity, and keep your equipment secure. By adhering to these regulations, you not only meet safety requirements but also make future upgrades smoother, proving that consistency in mounting points builds a foundation for long-term success.
What Should I Do if My Rack Doesn’t Fit Despite Measurements?
If your rack doesn’t fit despite measurements, try adjustment techniques like repositioning mounting brackets or shimming to improve fit. If that doesn’t work, explore alternative solutions such as using different mounting hardware, custom brackets, or a different rack model. Always double-check measurements and compatibility before making changes, and consult the manufacturer’s guidelines for specific adjustment options to guarantee a secure, proper fit.
Conclusion
Think of your rack and mounting points as a perfectly matched dance duo. When you check every step—measurements, compatibility, weight capacity—you guarantee they move in harmony. Skipping this checklist is like trying to fit a square peg in a round hole. Take your time, verify each point, and you’ll avoid costly missteps. With these precautions, your setup will flow seamlessly, turning a potential headache into a smooth, confident performance.