
To set up tubeless tires without stress, start by removing the tire and inspecting your rim for compatibility and tubeless readiness, then clean the rim thoroughly. Apply rim tape snugly, covering all spoke holes to ensure an airtight seal. Insert the valve stem, pour sealant through the valve, and mount the tire evenly. Inflate to seat the bead, spin to distribute sealant, and check for leaks. Following these steps carefully will make tubeless setup easier—keep going to learn more tips for a stress-free ride.
Key Takeaways
- Prepare and clean the rim thoroughly, ensuring compatibility and proper tubeless tape application for an airtight seal.
- Insert the tubeless valve securely and pour enough sealant to automatically seal punctures and leaks.
- Mount the tire evenly onto the rim, then use a floor pump to seat the bead with moderate pressure.
- Inflate to your desired pressure, spin or bounce the tire to distribute sealant evenly, and check for leaks.
- Confirm the seal is airtight, the tire maintains pressure, and then enjoy a stress-free, puncture-resistant ride.

Have you ever wondered how to set up tubeless tires for your bike or vehicle? It might seem intimidating at first, but with the right steps, it’s straightforward and stress-free. The key is understanding the essentials—mainly, tire sealant and rim tape. These two components are your best friends in creating a reliable, airtight seal that keeps you rolling smoothly.
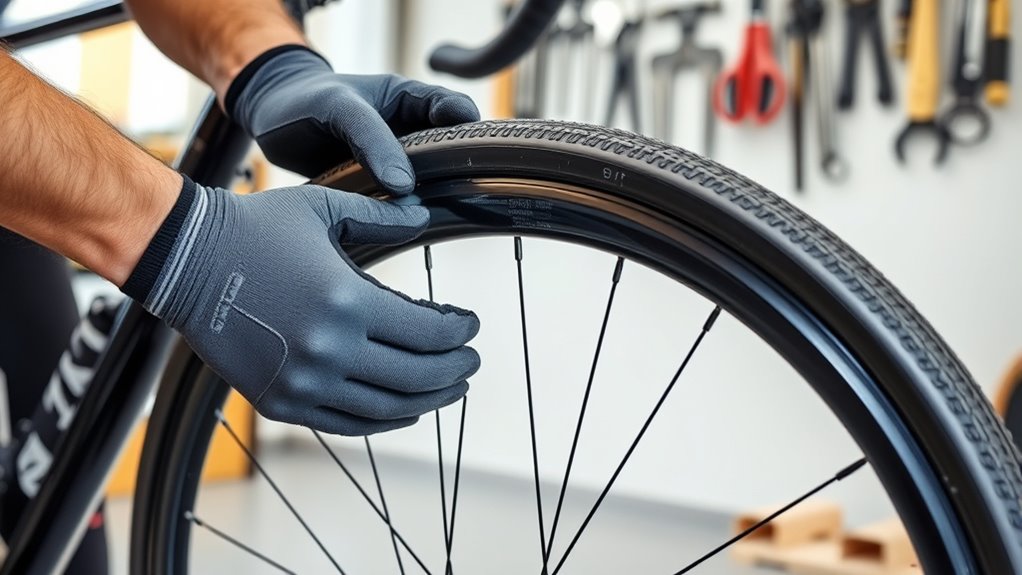
First, you need to prepare your rim properly. Start by removing your tire and inspecting the rim. If you’re switching from a clincher setup, you’ll want to ensure that your rim has a tubeless-compatible design. Once confirmed, clean the rim thoroughly to remove any dirt or debris, which could compromise the seal. Now, the critical step is applying rim tape. Rim tape acts as a barrier between the sharp edges of the spoke holes and the inner tube or sealant. Make sure to choose the right width of rim tape for your rim—too narrow, and it won’t seal well; too wide, and it might cause issues with fitting the tire. Carefully apply the rim tape, making sure it covers all spoke holes completely and adheres snugly without any wrinkles or overlaps.
Properly prepare your rim with clean, correctly-sized rim tape to ensure a reliable tubeless setup.
Next, you’ll want to install the tubeless valve stem, ensuring it fits tightly into the rim. Before reseating the tire, pour in a generous amount of tire sealant through the valve hole. Tire sealant is essential because it automatically seals small punctures and leaks, making your setup more reliable. Once you’ve added the sealant, carefully mount the tire back onto the rim, making sure it’s seated evenly on both sides. Use a floor pump to inflate the tire, but don’t overdo it initially—just enough to seat the bead. Once the bead pops into place, pump it up to your desired pressure. If needed, add a little more sealant through the valve and give the tire a good spin or bounce to distribute the sealant evenly inside.
Finally, check for leaks by listening closely or spraying soapy water around the rim and valve. If bubbles form, tighten the valve or add more sealant if necessary. Once everything’s sealed tight and holding air, you’re ready to ride. Setting up tubeless tires may seem detailed, but with proper rim tape, tire sealant, and patience, you’ll enjoy a smoother, puncture-resistant ride with less stress. Just follow these steps, and you’ll have a reliable tubeless setup in no time.

Muc-Off Ultimate Tubeless Setup Kit, Road/Gravel/CX 44mm – Tubeless Conversion Kit for Bikes – Includes Tubeless Tire Sealant and Tubeless Valve Stems
GOING TUBELESS?: Muc-Off Ultimate Tubeless Setup Kit is a one-stop shop for everything you need to make the…
As an affiliate, we earn on qualifying purchases.
As an affiliate, we earn on qualifying purchases.
Frequently Asked Questions
What Tools Are Essential for Tubeless Tire Setup?
To set up tubeless tires, you’ll need a few essential tools. First, a tire lever helps seat the tire bead securely onto the rim. A valve core removal tool allows you to install the tubeless valve. Sealant application is vital for sealing leaks and preventing flats, so have a syringe or applicator ready. An air pump or compressor quickly inflates the tire, ensuring the bead seats properly for a smooth ride.
How Often Should I Check Tubeless Tire Sealant Levels?
You might be surprised to find that checking your tubeless tire sealant levels every 2-3 months helps prevent leaks and guarantees peak performance. Regular sealant replenishment is key to leak prevention, especially if you ride frequently or in rough conditions. Keep an eye on your tires, and top off the sealant as needed to maintain a good seal and avoid unexpected flats. Staying proactive keeps you rolling smoothly.
Can I Convert Any Bike to Tubeless Tires?
You can often convert your bike to tubeless tires, but bike compatibility and rim suitability matter. Check if your rims are tubeless-ready or can be converted with tape and valves. Some older or non-standard rims might need additional adapters or may not be suitable. If your rims are compatible, converting is straightforward, and you’ll enjoy the benefits of lower pressure and fewer flats. Always verify rim compatibility before starting the conversion process.
What Are Common Causes of Tubeless Tire Leaks?
You might experience tubeless tire leaks from valve leaks or rim damage. Valve leaks happen when the valve seal isn’t tight or gets damaged, causing air to escape. Rim damage, like cracks or dents, can prevent the tire bead from sealing properly, leading to leaks. Regularly check your valve and inspect rims for damage to prevent leaks and keep your tubeless setup secure.
How Long Does a Tubeless Tire Setup Typically Last?
A tubeless tire setup typically lasts between 2,000 to 3,000 miles, depending on durability factors like riding style, terrain, and tire quality. Proper maintenance tips, such as regularly checking for leaks, guaranteeing correct sealant levels, and inspecting for cuts or damage, help extend its lifespan. Keep your tires in good shape by staying attentive to wear and tear, which ensures peak performance and longevity.

Muc-Off Tubeless Rim Tape, 25mm – Adhesive Bike Tire Liner, Tubeless Tape for MTB/Road/Gravel Bikes – Tubeless Kit Including 10m Roll of Bike Tape
GOING TUBELESS?: Our bike rim tape is the perfect choice if you’re looking to make the switch to…
As an affiliate, we earn on qualifying purchases.
As an affiliate, we earn on qualifying purchases.
Conclusion
Now you’re ready to conquer the trails with confidence, riding on a seamless, puncture-resistant dream. Setting up tubeless tires might seem like a mountain, but with these steps, you’ve turned it into a gentle hill. Think of your tires as a well-tuned orchestra, each part harmonizing perfectly. So, hit the road or trail with the wind at your back, knowing you’ve tamed the beast and turned stress into smooth sailing.

BWSHLF Tubeless Presta Valve Stem 40/44/55/60/65/80/100 mm, Super Light Alloy Presta Valve Stem Kit with Valve Core Remover Tool and Valve Stem Caps – Multiple Color and Size Options(Pair)
Super Light & Anti-rust: Made of lightweight anodized aluminum, our tubeless presta valve stem is not only lightweight…
As an affiliate, we earn on qualifying purchases.
As an affiliate, we earn on qualifying purchases.

Orange Seal – Endurance Formula Tubeless Bike Tire Sealant with Injector | Long Lasting, Fast Sealing | for MTB, Road, CX and Gravel Bicycle Tires | 8oz w/Injector
Long-lasting latex formula provides superior durability, staying effective for 2-3 times longer than standard sealants to minimize maintenance…
As an affiliate, we earn on qualifying purchases.
As an affiliate, we earn on qualifying purchases.