
To plan your photo-friendly stops for golden hour, use apps or websites to track sunrise and sunset times at your location. Arrive early or stay late to catch the best light, and choose spots with natural beauty or interesting architecture. Slight movements and angles can dramatically improve your shots, so be ready to adjust. Focusing on light interaction will elevate your photos from good to great—keep exploring for more expert tips.
Key Takeaways
- Research and select scenic or architecturally interesting locations that benefit from soft, warm light during golden hour.
- Use apps or websites to accurately track sunrise and sunset times for your planned stops.
- Schedule visits early in the morning or late afternoon to maximize golden hour photography opportunities.
- Arrive at each stop ahead of time to set up and adjust angles for optimal light interaction with the scene.
- Carry essential gear like a tripod and shoot in RAW to capture high-quality images with flexible post-processing options.
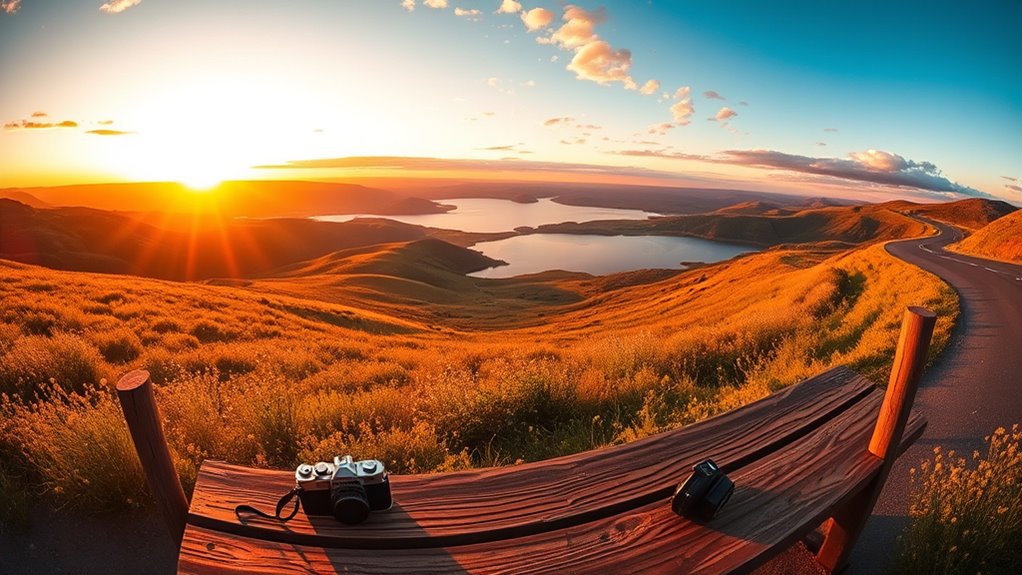
Are you looking for the perfect spots to capture stunning photos on your next trip? Planning around the best photography spots can make a huge difference in your images, especially when you time your visits with the golden hour. This magical period, shortly after sunrise or before sunset, offers soft, warm light that enhances colors and adds depth to your photos. To truly capitalize on this, you need to understand lighting optimization techniques that bring out the best in each location. Knowing when and where to shoot during these hours can elevate your photography from good to extraordinary.
Start by researching the top photography spots in your destination. These locations are often popular for their natural beauty, interesting architecture, or unique features that shine under the right lighting. Once you identify these spots, plan your visit around the golden hour. The light during this period is gentle and diffused, reducing harsh shadows and creating a flattering glow on your subject. It’s the ideal time to capture landscapes, cityscapes, or portraits because the lighting emphasizes textures and colors in a way that midday sun simply can’t match.
Discover top photography spots and capture stunning images during the golden hour’s gentle, flattering light.
To optimize your lighting, arrive early or stay late, as the window for perfect lighting is brief. Use apps or websites that track sunrise and sunset times to plan your schedule precisely. When you reach your chosen location, pay attention to how the light interacts with the scene. Sometimes, a slight change in angle or position can dramatically improve your shot by catching the light just right. For instance, moving a few steps to the left or right might find you better shadows, highlights, or reflections that add interest to your photo.
Additionally, consider your camera settings and techniques to maximize lighting effects. Use a lower ISO to keep images crisp and avoid graininess, and shoot in RAW format if possible, so you can make fine adjustments later. A tripod can help stabilize your camera for sharper images in lower light conditions, especially if you’re aiming for long exposures to capture more light or motion effects. Understanding juice extraction techniques can also help you keep your energy up during long photography sessions in the field.
Frequently Asked Questions
What Is the Best Time to Start Planning for Golden Hour Photos?
You should start planning for golden hour photos about an hour before sunset. This gives you enough time to contemplate timing considerations like changing light conditions and to set up your equipment. Use planning strategies such as checking local sunset times and scouting locations early. By preparing ahead, you guarantee you don’t miss the perfect moment. Being proactive helps you capture stunning images with ideal lighting and composition.
How Do Weather Conditions Affect Golden Hour Photography Plans?
Weather conditions substantially impact your golden hour photography plans. Cloud cover can soften or diffuse sunlight, creating more even lighting but potentially dulling the warm glow. Clear skies produce intense, golden hues, while overcast skies may reduce vibrancy. Temperature effects also matter; extreme cold or heat can affect your equipment and comfort. Check the forecast to time your shoot when clouds and temperature conditions align, ensuring ideal lighting and a smooth experience.
Can Urban Locations Be Ideal for Golden Hour Photography?
Isn’t it ironic how urban landscapes often dazzle during golden hour? Yes, city skylines and bustling streets can be perfect for golden hour photography. The warm, diffused light enhances skyscrapers and street scenes, creating stunning contrasts. You can play with reflections, shadows, and vibrant colors that only golden hour offers. So, don’t overlook the urban environment—its unique character can turn your photos into extraordinary works of art.
What Gear Is Essential for Capturing Perfect Golden Hour Shots?
To capture perfect golden hour shots, you need a sturdy tripod to guarantee stability and sharp images, especially in low light. Choose a versatile lens, like a wide-angle or prime, to embrace the warm, soft light and capture more detail. Bring a lens cleaning kit, extra batteries, and ND filters if you want to regulate exposure. These essentials help you make the most of golden hour’s fleeting beauty.
How Do You Adjust Settings for Changing Light During Golden Hour?
Think of golden hour as nature’s soft spotlight. You should make exposure adjustments to prevent overexposure, capturing the warm glow without losing details. Tweak the white balance to enhance those rich amber tones. Keep an eye on your histogram, and don’t be afraid to experiment with aperture and ISO for perfect clarity. These subtle shifts will turn fleeting moments into timeless images, perfectly lit and beautifully balanced.
Conclusion
As you plan your stops during golden hour, remember that over 80% of professional photographers prefer this time for capturing stunning images. By choosing photo-friendly spots and timing your stops just right, you’ll enhance your pictures’ beauty and impact. So, keep an eye on the clock, seek out scenic views, and make the most of this magical hour. Your photos will thank you, and your memories will be more vibrant than ever.